Skip to content
Anthony's Italian-American Recipes
Italian-American Recipes Just like grandma used to make!
Menu
Home
Italian Recipes Menu
Anisette Cookie Recipe
Antipasto Recipe
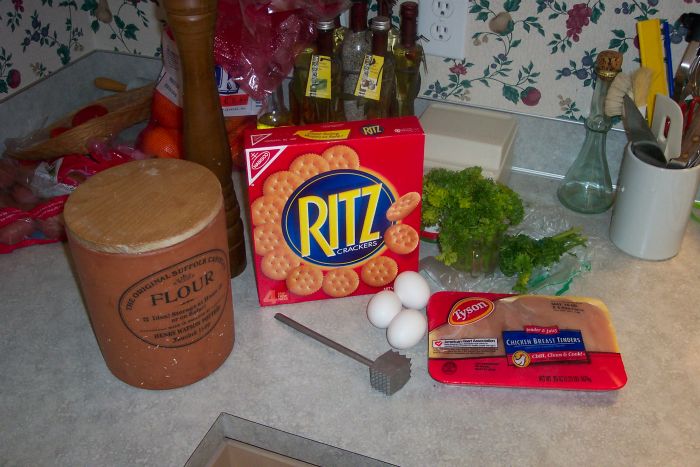
Chicken Cutlet Recipe
Chicken Soup with Semolina Pasta Recipe (Molbann Soup)
Eggplant Parmesan Recipe
Fettuccine Alfredo Recipe
Frittata With Asparagus Recipe
Garlic Bread Recipe
Garlic Carrots Recipe
Italian Bow Tie Cookie Recipe
Italian Bread Recipe
Lasagna Recipe
Pasta Sauce, Meatballs, Sausage and Braciole Recipe
Anthony’s Pasta and Leftover Tips
Braciole
Browning the Meatballs and Braciole
How To Use The Salt Pork with the Meatballs
Pasta Sauce Photos | Step by Step Details
Peseta Bars Italian Cookies Recipe
Ravioli Recipe
Sausage Bread Recipe
Taralli Italian Cookie Recipe
Ricotta Cheese Pie Recipe
Stromboli Recipe
Stuffed Artichoke Recipe
Stuffed Peppers Recipe
Zucchini and Tomato Appetizer
Sauce Talk
Sauce Talk 01
Sauce Talk 02
Sauce Talk 03
Sauce Talk 04
Sauce Talk 05
Sauce Talk 06
Sauce Talk 07
Sauce Talk 08
My Italian Grandma
About This Website
Contact
Extra Stuff
Anthony’s List Of Amazing Food Blogs
Anthony’s Pasta Cooking and Leftover Tips
Feast of The Seven Fishes Menu
Growing Up Italian In America
Italian Recipe Visitors Photos
Previous Image
Next Image
Chicken-Cutlet_01
Like
Loading...
Leave a comment
Cancel reply
Δ
Post navigation
Published in
Chicken Cutlet Recipe
Anthony's Italian-American Recipes
Sign up
Log in
Copy shortlink
Report this content
Manage subscriptions
%d